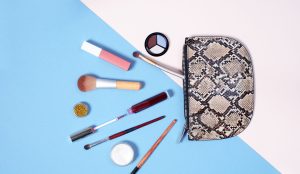
A makeup bag can get messy surprisingly quickly. Products you use every day end up mixed with things you rarely touch, powders can leave residue behind, and smaller items somehow always seem to disappear to the bottom. Keeping everything organized does not require a complicated system, but a few simple habits can make the bag much easier to use.
What helped me most was realizing that I did not need to keep every beauty product I owned in the same bag. Once I separated everyday items from occasional products, it became much easier to find what I needed without digging through everything first.
Start by Emptying Everything Out
The easiest way to organize a makeup bag is to start with a completely empty one. Take everything out and place the products on a clean surface so you can see exactly what you have. This is usually the moment when I notice how many items have been sitting in the bag untouched for weeks.
Sort the products into simple groups such as everyday makeup, occasional products, tools, and items that belong somewhere else. You may also come across empty packaging or products you no longer use. Removing those immediately creates more space without needing any extra organizers.
Keep Only Everyday Products in Your Main Bag
Your main makeup bag does not need to hold your entire collection. Keeping only the products you use regularly makes it much easier to stay organized.
For example, you might keep your usual foundation, concealer, mascara, blush, lip product, and a few basic tools in the bag you reach for every morning. Products for special occasions or colors you rarely wear can be stored separately in a drawer or another pouch.
I used to keep several similar lip products and eye palettes in one bag just in case I wanted them, but most of them were barely used. Moving those out made the daily bag feel much less cluttered.
Group Similar Items Together
Grouping products by type can save a surprising amount of time. Lip products can go together, eye products in another section, and tools such as tweezers, sharpeners, or small brushes can stay in a separate pocket if your bag has one.
If your makeup bag has no compartments, small pouches or clear zip bags can work just as well. You do not need to divide every single item, but keeping the smallest products together stops them from disappearing underneath larger bottles and compacts.
Choose the Right Size Bag
A bag that is too small becomes difficult to close and quickly turns messy. A bag that is much larger than you need can create the opposite problem, because products move around and become harder to find.
I prefer a bag with just a little extra room after the essentials are inside. It gives you enough space to move things around without encouraging you to keep adding products simply because there is room.
A wipeable interior is also practical, especially for products such as foundation, powder, or lipstick that can leave marks behind.
Keep Brushes and Tools Separate When Possible
Makeup brushes, eyelash curlers, tweezers, and other tools can easily get buried among products. If possible, keep them in a separate compartment or small pouch inside the bag.
This also makes cleaning easier. Instead of emptying the entire bag every time a brush leaves a little powder behind, you only need to clean the smaller section.
For brushes that are still damp after cleaning, wait until they are completely dry before putting them back into a closed makeup bag.
Clean Up Small Spills Quickly
Small spills are much easier to deal with when they are fresh. If a bottle leaks or a powder compact leaves residue inside the bag, wipe it up before putting everything back.
Every so often, empty the bag and wipe the inside according to the care instructions for the material. Some fabric bags may be washable, while others only need a damp cloth.
I started doing this whenever I reorganize the contents rather than treating cleaning as a completely separate job. It only adds a few minutes and stops residue from building up over time.
Check Products Before Putting Them Back
Organizing is also a useful opportunity to check the condition of what you are carrying. Make sure lids close properly, pencils still have caps, and bottles are not leaking.
If a product smells unusual, has changed noticeably in texture or appearance, or is past any recommended period of use shown on the packaging, it may be time to replace it. Following the manufacturer’s storage and use guidance is the safest approach.
There is no need to inspect everything every day. A quick check whenever you reorganize the bag is usually enough.
Create a Small Routine That Is Easy to Maintain
The simplest organization system is one you will actually keep using. After getting ready, put products back in roughly the same place rather than leaving them loose on the counter and pushing everything into the bag later.
Once a week or every couple of weeks, take a quick look inside and remove anything that has wandered in but does not need to be there. Receipts, hair ties, cotton swabs, and random samples have a way of collecting surprisingly quickly.
For me, the bag stays much tidier when I do these tiny resets instead of waiting until it becomes so messy that I have to reorganize the whole thing from scratch.
Keep It Practical
A well-organized makeup bag does not need matching containers or a perfect layout. The goal is simply to make the products you use easy to find, keep smaller items from getting lost, and avoid carrying around things you do not need.
Starting with fewer products, grouping similar items, and giving the bag an occasional clean is usually enough. Once everything has a simple place, keeping it organized takes very little effort.