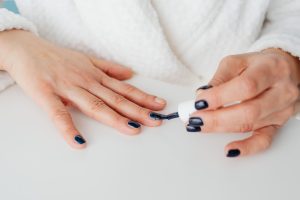
Applying nail polish at home sounds simple, but small things like uneven coverage, smudges, or polish around the cuticles can make the result look messier than expected. The good news is that you do not need professional equipment to get a neat, polished finish.
I have found that the biggest difference comes from taking a little more time with preparation and using thin layers instead of trying to get full coverage in one coat. A steady application and enough drying time usually matter more than having a large collection of manicure products. Here is a simple step-by-step approach.
Prepare Your Nails First
Start by removing any old polish and making sure the nail surface is clean and dry. If you want to shape the nails, use a nail file gently around the edges until you are happy with the shape.
Before applying polish, wipe away any visible lotion, oil, or residue from the nail surface. A nail cleanser or polish remover that is suitable for your nails can be used if needed. I usually do this part before opening the polish bottle so there is less chance of touching the nail surface again afterward.
Step 1: Apply a Base Coat
A clear base coat can create a smoother surface for the color and may also help reduce direct contact between strongly pigmented polish and the natural nail. Apply a thin layer and allow it to dry according to the product instructions before continuing.
Step 2: Remove Excess Polish from the Brush
When you lift the brush from the bottle, wipe one side gently against the inside of the neck. You want enough polish to cover the nail without having a large drop sitting on the brush. I find that using slightly less product makes it much easier to control where the polish goes.
Step 3: Apply the Color in a Few Smooth Strokes
Place the brush near the center of the nail, leaving a small gap around the cuticle. Pull the polish toward the tip, then use one or two additional strokes to cover the sides. There is no need to follow an exact number of strokes every time.
The aim is simply to spread the polish evenly without repeatedly brushing over areas that are already starting to dry. If a little polish reaches the skin, it is usually easier to clean it up afterward than to keep correcting the wet nail.
Step 4: Build the Color with Thin Layers
Thin coats are usually easier to control than one heavy layer. Depending on the polish, one coat may already give enough coverage, while other colors may look better with a second thin coat. Let each layer dry according to the instructions on the bottle before adding another.
I prefer stopping at two thin coats rather than continuing to add polish in search of a perfectly opaque finish, especially with lighter or more sheer colors.
Step 5: Pay Attention to the Nail Tip
If you notice that polish tends to wear first around the tip of the nail, you can lightly run the brush across the free edge during the final color coat. You do not need much product here. A small amount is enough.
Step 6: Finish with a Top Coat
Once the color is ready, apply a thin layer of clear top coat. A top coat can add shine and help protect the surface of the polish during normal wear. Apply it evenly and allow enough time for everything to dry before using your hands normally again.
Give the Polish Time to Dry
This is probably the part I find hardest to be patient with. Even when polish feels dry on the surface, the layers underneath may still be soft. Try to avoid immediately doing things that involve pressure on the nails, such as opening cans, buttoning tight clothing, or reaching into a bag. Giving the manicure a little extra time usually saves much more frustration than having to repaint a smudged nail.
Keep the Process Simple
A neat home manicure does not require a complicated routine. Clean nails, controlled amounts of polish, thin layers, and enough drying time are usually the most important parts. Once you get used to using less polish on the brush, the whole process becomes much easier to control.
I find that aiming for a clean, even result works better than trying to make every nail look absolutely perfect. Small improvements in technique usually make the biggest difference over time.