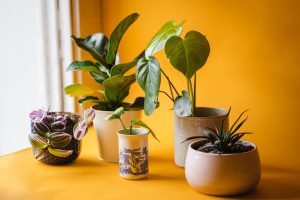
Bringing houseplants into your home is a simple way to add natural color and texture to a room, but I found plant care surprisingly difficult when I first started. I was never quite sure whether I was watering too much, giving a plant enough light, or choosing the right spot for it. A plant would start looking unhappy and I often had no idea what I had done wrong.
What helped most was realizing that houseplant care does not need to be complicated. Once I started focusing on a few basic things, such as light, soil moisture, drainage, and the size of the pot, it became much easier to understand what each plant needed. The tips below are the simple habits that helped me feel much more confident with houseplants and made caring for them far less confusing.
Understand the Light in Your Home
Light is one of the first things to look at when choosing where to place a houseplant. Different plants prefer different conditions, and moving a plant just a few feet can sometimes make a noticeable difference. Bright, direct light usually means the plant receives several hours of sunshine through a window. Cacti and many succulents often prefer this kind of position. Bright, indirect light means the room is well lit without the plant sitting in strong sun for long periods. Many common houseplants, such as pothos, monstera, ficus, and philodendron, are often kept in these conditions.
Low-light areas receive much less natural daylight. Some plants tolerate these spaces better than others, but low light does not mean no light at all. When I first started keeping houseplants, I made the mistake of choosing a spot mainly because the plant looked nice there. Now I try to think about the light first and decoration second. It also helps to watch the plant over time. If it starts leaning strongly toward the window, producing smaller growth, or looking different from when you bought it, the position may be worth reconsidering.
Check the Soil Before Watering
Watering was probably the part I overthought most in the beginning. I assumed every plant needed water on a fixed schedule, but the soil often gives you much more useful information than the calendar.
A simple way to check is to press your finger a couple of centimeters into the soil. If the top layer still feels noticeably damp, the plant may not need more water yet. If it feels dry, it may be time to water, depending on the type of plant.
This does not work exactly the same way for every species, but it is a useful beginner habit because it encourages you to check the plant rather than water automatically every Sunday.
When you do water, add enough so the soil is evenly moistened and allow excess water to drain away. I also make sure not to leave a pot sitting in a saucer full of water for long periods.
Make Sure Excess Water Can Escape
Drainage is one of those small details that I did not pay much attention to at first, but it makes plant care much easier. A pot with a drainage hole allows extra water to leave the soil instead of collecting around the roots. If you like decorative pots without holes, you can keep the plant in a smaller nursery pot inside the decorative container and remove it when watering.
After watering, let the inner pot drain before putting it back. This setup is especially useful because you get the appearance of a decorative planter without giving up practical drainage.
Use a Pot That Fits the Plant
Bigger is not always better when it comes to plant pots. When repotting, moving to a container that is only slightly larger than the current one is usually easier to manage than placing a small plant into a very large pot. A large amount of unused soil can stay damp for longer, which makes watering harder to judge.
I used to think repotting meant giving the plant as much room as possible. In practice, moving up gradually is much simpler. The exact soil also depends on the plant. A standard indoor potting mix works for many common houseplants, while cacti, succulents, orchids, and some other plants may prefer a more specialized mix. Checking the plant label or care instructions is useful before repotting.
Keep the Leaves Clean
Houseplant leaves collect household dust just like shelves and furniture do. For plants with larger, smooth leaves, I occasionally wipe them gently with a soft damp cloth. It makes the plant look fresher and gives you a chance to inspect the leaves at the same time.
There is no need to polish them aggressively or use complicated homemade mixtures. Plain water and a soft cloth are often enough for routine dust removal. For smaller or more delicate leaves, a gentle rinse or soft brush may be easier than wiping each leaf individually.
Rotate Plants Every So Often
Plants naturally grow toward light, which can make one side become fuller than the other. Giving the pot a small turn every now and then can help the plant receive light from different directions. I usually remember to do this when watering rather than trying to keep another separate schedule. You do not need to rotate the plant constantly. A small quarter-turn from time to time is usually enough to keep the habit simple.
Remove Dry or Damaged Leaves
Older leaves will sometimes turn yellow or dry out, even when the rest of the plant is doing well. Once a leaf is completely dry or clearly declining, you can usually remove it with clean scissors or gently by hand if it comes away easily. I prefer using clean scissors because it keeps the cut neat and avoids pulling on the plant unnecessarily.
Do not panic over a single yellow leaf. Plants naturally replace older growth, and one changing leaf does not automatically mean something is wrong. What matters more is whether several leaves are changing at once or the plant is showing other signs that its conditions may need adjusting.
Pay Attention to Changes
One thing that helped me most was learning to actually look at the plant instead of following a checklist blindly. If leaves start drooping, yellowing, drying at the edges, or changing unusually quickly, something in the routine may need adjusting. That does not always mean adding more water. Light, temperature, drainage, pests, or even a recent move can all affect how a plant looks.
Before changing several things at once, I try one small adjustment and give the plant some time. Otherwise, it becomes difficult to know what actually helped.
Do Not Move Plants Constantly
It can be tempting to move plants around the house until you find the perfect decorative spot, but frequent changes can make it harder to judge whether a location works. Once you have found a reasonably suitable place, leave the plant there for a while and observe it.
Seasonal changes are different. A window that receives gentle light in winter may become much brighter in summer, so occasionally reassessing the position makes sense.
Keep Your Routine Simple
You do not need a complicated plant-care calendar. For me, the easiest routine is simply to check the plants once or twice a week. I look at the soil, remove any dry leaves, check whether anything needs watering, and occasionally wipe dusty foliage. That takes much less time than trying to remember a separate schedule for every single plant.
Give Yourself Time to Learn
Houseplant care becomes much easier once you stop expecting to understand everything immediately. Different plants behave differently, and even two plants of the same type may need slightly different care depending on where they are placed in your home. Light levels, temperature, pot size, and the season can all change how quickly soil dries.
I found it much more enjoyable once I stopped trying to follow every piece of plant advice perfectly and started paying attention to what was happening in front of me. Start with a few easy plants, learn how your home conditions affect them, and make small adjustments when needed. With a little practice, caring for houseplants starts to feel much more natural.