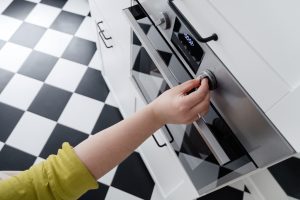
Ovens can get messy surprisingly quickly. Small spills, crumbs, grease, and baked-on residue can gradually build up on the racks, door, and interior, especially if you use the oven several times a week. Cleaning it regularly is much easier than waiting until everything has become stubborn and difficult to remove.
I used to put oven cleaning off because it always felt like a big job. In reality, most of the work is just giving the cleaner enough time to soften the buildup and then wiping everything down in a sensible order. Once I stopped trying to scrub the whole oven at once, it became much more manageable.
Start With a Cool, Empty Oven
Make sure the oven is completely cool before you begin, then remove the racks, trays, and anything else that is stored inside. This gives you much more room to work and makes it easier to see where the mess actually is.
I usually start by brushing out loose crumbs from the bottom with a dry cloth or soft brush. It only takes a minute, but it stops those crumbs from turning into a wet mess once you start cleaning.
If your oven has a self-cleaning or steam-cleaning function, check the manual before using any products inside. Manufacturers can have very different instructions depending on the model and interior coating.
Clean the Oven Racks Separately
The racks are much easier to deal with outside the oven. Place them in a sink, large basin, or another suitable area and wash them with warm water and mild dish soap.
If there is dried-on residue, let the racks sit for a little while before wiping them with a soft sponge or non-abrasive cloth. I have found that soaking them first is much easier than immediately trying to scrub everything away.
Avoid steel wool or very abrasive cleaners unless the manufacturer specifically says they are suitable, since some racks have coatings that can be scratched.
Choose a Cleaner That Suits Your Oven
Before applying anything to the interior, check the oven manual or care instructions. Some ovens can be cleaned with a mild detergent and water, while others may allow a dedicated oven cleaner.
I would not automatically mix homemade cleaning ingredients or use a strong chemical cleaner just because it works on another oven. Interior coatings, heating elements, and self-cleaning surfaces can all respond differently.
If you are using a commercial oven cleaner, follow the label carefully and make sure the room is well ventilated.
Work on the Interior in Sections
Instead of trying to clean the entire oven at once, work in smaller areas. Apply the recommended cleaner where needed and give it the amount of time stated on the product label or in the appliance instructions.
Start with the side walls and back, then move to the bottom. A soft sponge or cloth is usually enough once the residue has had time to soften.
This is the part where I used to make the job harder than necessary. Scrubbing immediately usually took much longer. Letting the product do some of the work first makes the whole process calmer and quicker.
Be careful around heating elements, fans, sensors, and other openings. Do not soak these areas or apply cleaner directly unless the manufacturer says it is safe.
Pay Attention to the Oven Door
The oven door often needs slightly different treatment from the main interior. Wipe the inside glass with a cleaner that is suitable for your model, then use a damp cloth to remove any remaining residue.
Grease can sometimes collect around the door edges and seals, so give those areas a gentle wipe too. Avoid pulling at the seal or soaking it with cleaner.
If there is residue between the glass panels, do not try to take the door apart unless the manual explains how to do it safely. Some doors are designed for this, while others are better left alone.
Wipe Everything Down Carefully
Once the residue has loosened, go over the interior with a clean damp cloth. You may need to rinse the cloth several times as you work.
Continue until there is no obvious cleaner or loose residue left behind. I usually do one final pass with a fresh cloth because it is easy to miss a corner when the oven is still damp.
Leave the door open for a while afterward so the interior can dry properly before replacing the racks.
Clean the Exterior and Controls
The outside of the oven is much simpler. Use a soft cloth and a cleaner suitable for the surface to wipe the handle, door, and surrounding area.
For control panels, put the cleaner on the cloth rather than spraying directly onto buttons or openings. If the oven has stainless steel surfaces, follow the care instructions for that finish.
It is a small detail, but wiping the handle at the end makes the oven look much cleaner overall because that is the part you touch most often.
How Often Should You Clean Your Oven?
There is no single schedule that works for everyone. If you cook frequently or often prepare foods that splatter, the oven may need attention more often.
I normally deal with fresh spills once the oven has cooled instead of leaving them for the next full clean. That makes a noticeable difference because dried residue is usually much harder to remove later.
A deeper clean is useful whenever you notice visible buildup, lingering residue, or the interior simply looks overdue for attention.
Make Future Cleaning Easier
A few small habits can reduce the amount of work next time. Wipe up spills after the oven has cooled, use trays that are large enough to catch drips, and avoid letting crumbs collect on the bottom.
Do not line the bottom of the oven with foil unless the manufacturer specifically allows it. On some models, this can interfere with airflow or damage the oven surface.
Keeping an eye on small messes has made oven cleaning much less annoying for me. A quick wipe after a spill is much easier than dealing with several months of baked-on residue at once.
Keep the Process Simple
Oven cleaning does not need to involve hours of hard scrubbing. Empty the oven, deal with loose debris first, clean the racks separately, use a product that is appropriate for your model, and give stubborn residue time to soften before wiping it away.
Once I started treating it as a few smaller jobs instead of one big deep-cleaning project, it became much easier to keep up with. A little regular attention usually saves a lot of work later.